Let me introduce you to a delightful culinary gem – Sprout Chilla. Lentil sprouts, also known as germinated lentils, are a delicious and nutritious addition to any meal. These tiny powerhouses are packed with essential nutrients and have a delightful crunchy texture. Whether you’re a health-conscious individual or simply looking to add more variety to your diet, lentil sprouts are a fantastic choice.
Let’s get started!
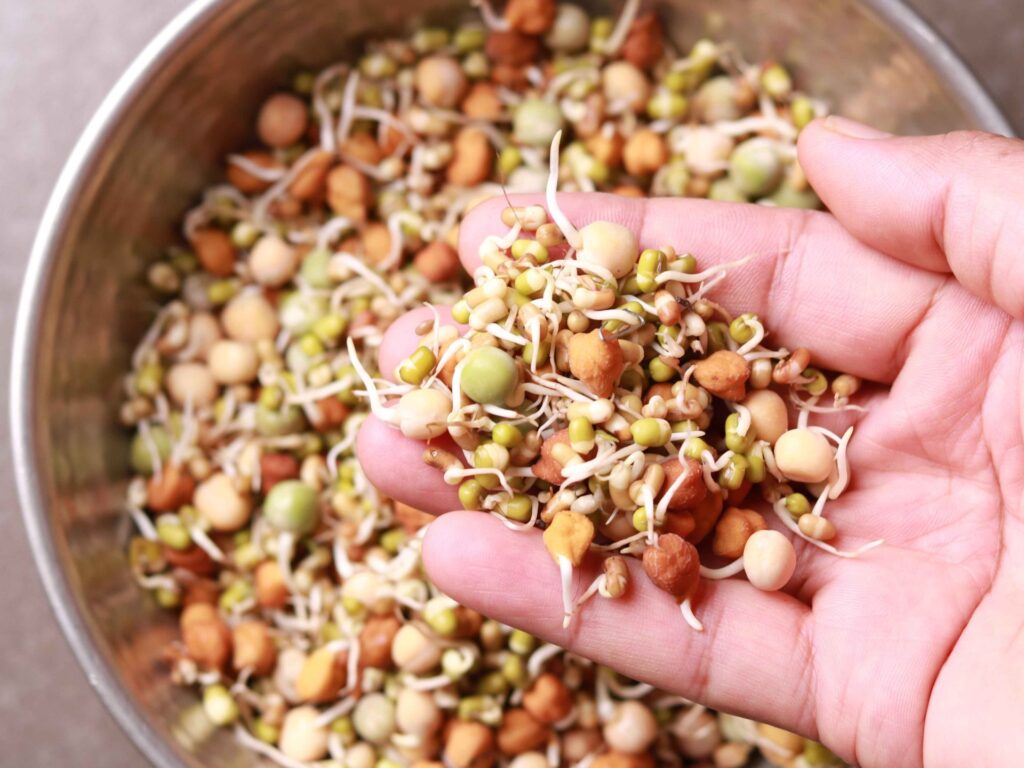

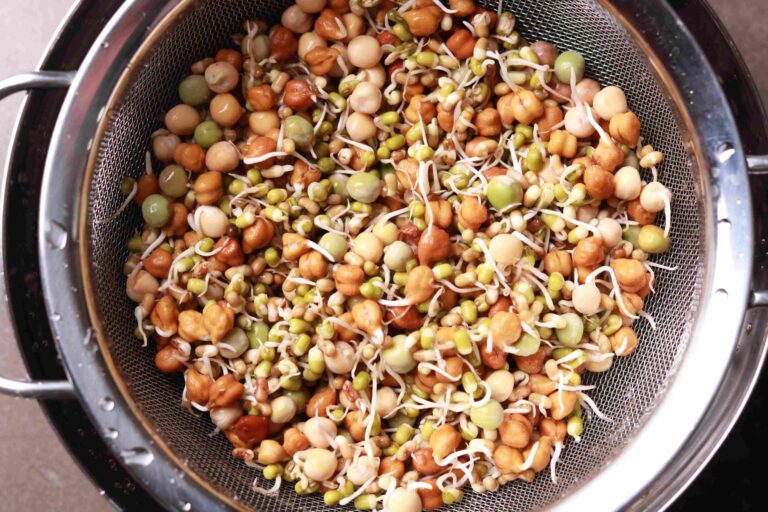
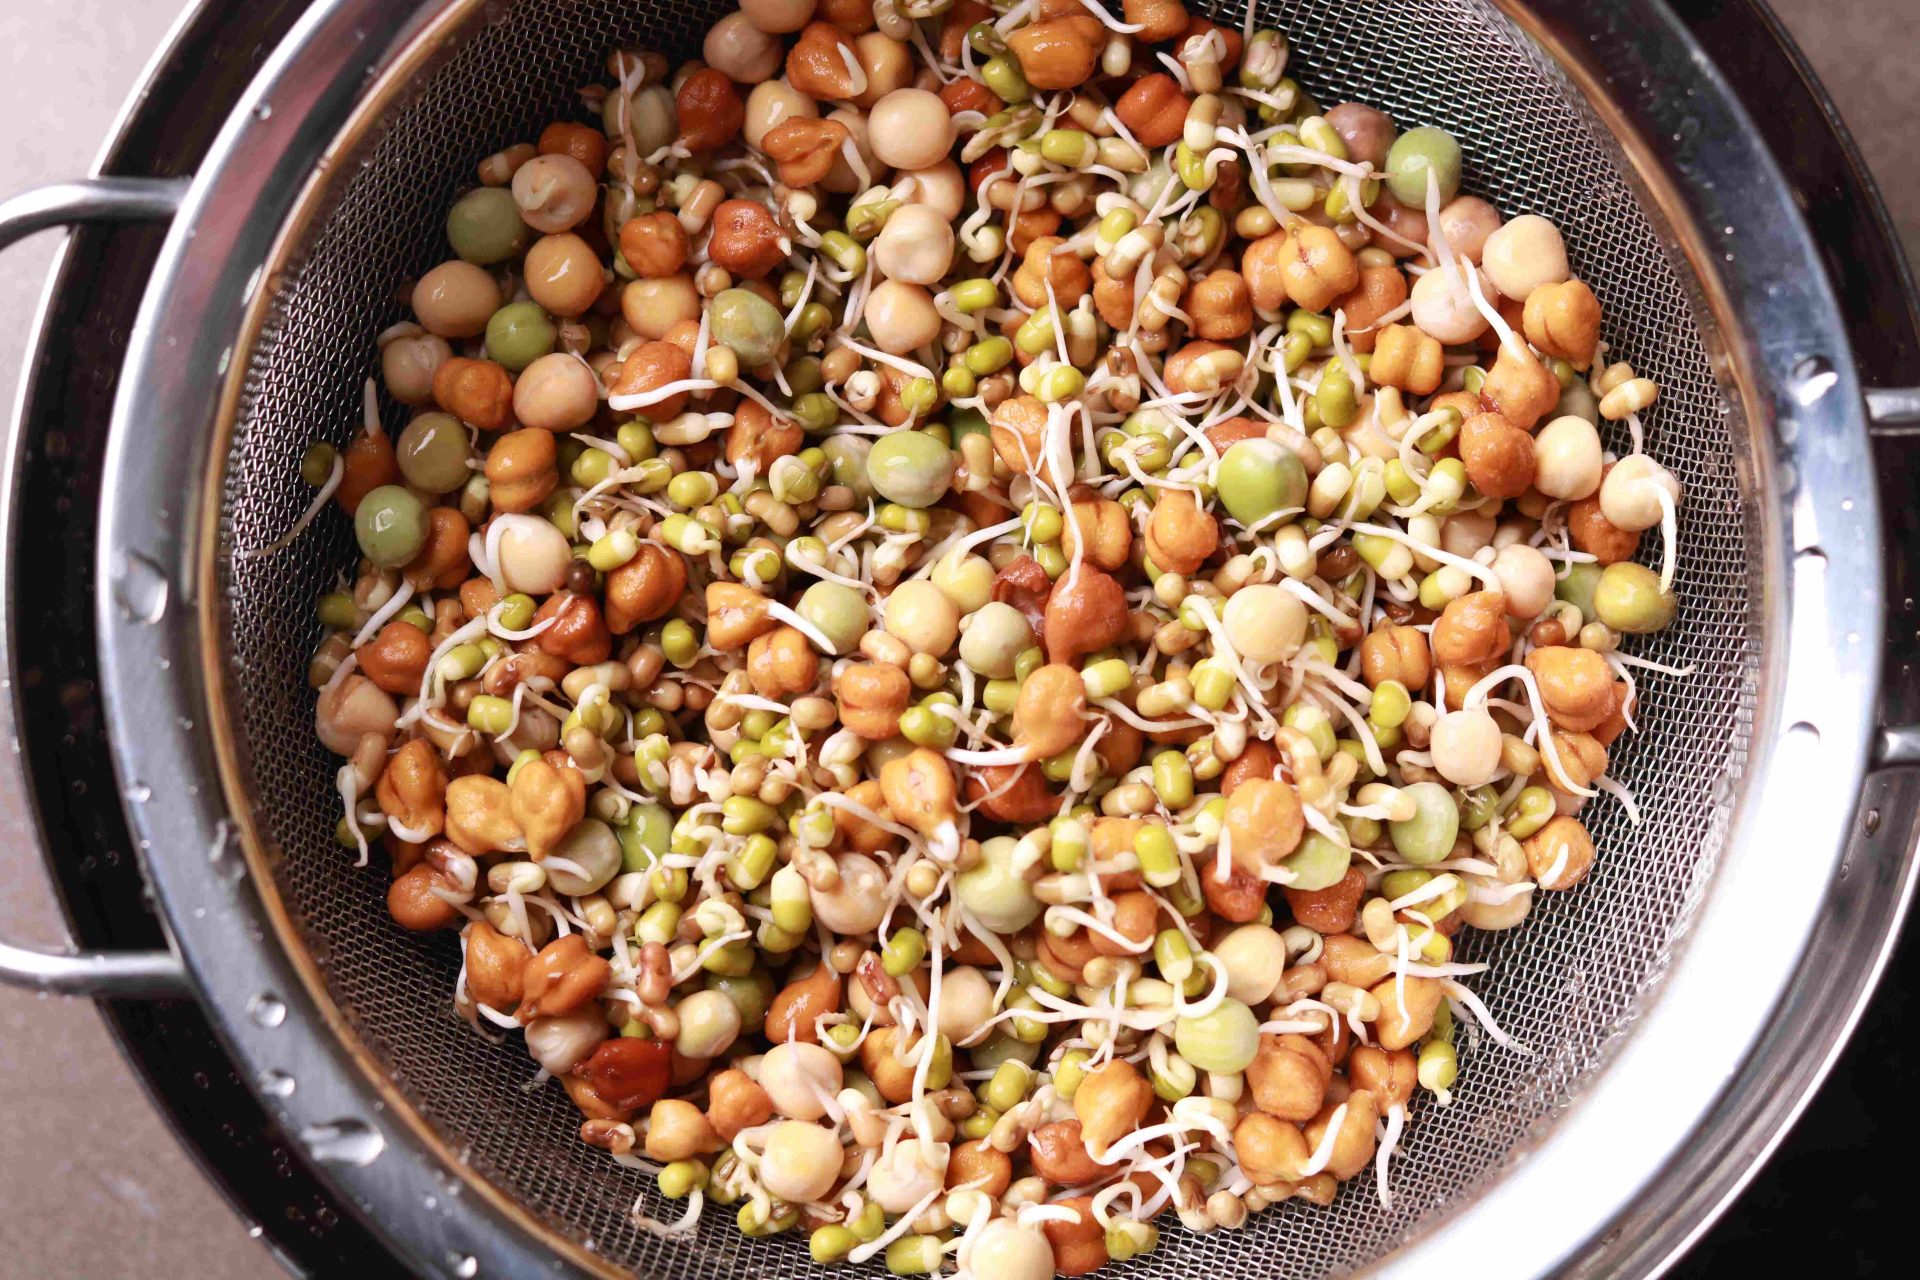
While walking through the vibrant farmers’ market this morning, I stumbled upon a stall adorned with an array of colorful sprouts. Without a second thought, I picked up some for myself. Sprouts are incredibly versatile, finding their way into salads, stir-fries, soups, and more. In this recipe, I’ll be sharing my take on using mixed sprouts, but feel free to use your favorite variety. The best part? No soaking required!
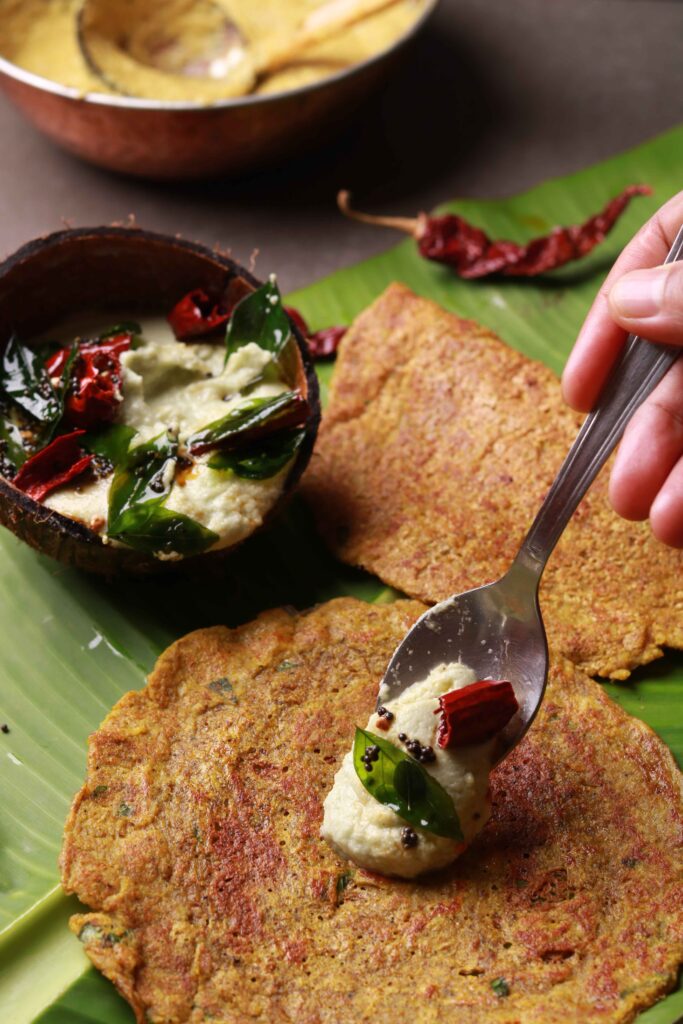
Chilla, a cherished classic in Indian cuisine, is a delectable savory pancake made originally made from gram flour (besan). Its roots run deep in the culinary history of India, where it has been a beloved breakfast or snack option for generations. The batter, often enriched with spices and herbs, is skillfully ladled onto a hot griddle, creating a thin, golden-brown pancake that’s both crisp and tender. Chilla’s appeal lies in its versatility; it can be customized with various fillings like vegetables or sprouts, offering a delightful burst of flavors. Whether enjoyed as a quick morning bite or a satisfying tea-time treat, chilla remains a timeless favorite that embodies the rich tapestry of Indian flavors and traditions.
How to Grow Lentil Sprouts at Home
Growing lentil sprouts at home is a simple and rewarding process. To start, you’ll need a handful of lentils and a jar or a sprouting tray. Begin by rinsing the lentils thoroughly and then soak them in water for about 8 hours. After soaking, drain the water and transfer the lentils to the jar or sprouting tray.
Cover the jar with a breathable cloth or use the tray’s lid with holes to allow proper air circulation. Place the jar or tray in a cool, dark place and rinse the lentils twice a day, ensuring they stay moist but not waterlogged. Within 3-5 days, you’ll have beautiful lentil sprouts ready to be harvested and enjoyed!
Sprout Chilla: image gallery


Chef yogi’s notes
Variety of Sprouts: While the recipe calls for mixed sprouts, you can use your favorite sprout variety or a combination of them for added flavor and nutrition.
Texture Preference: Adjust the coarseness of the batter according to your preference. Some prefer a finer texture, while others like it slightly coarse for added bite.
Spice Level: Control the spiciness by adjusting the number of green chilies. Removing the seeds reduces the heat, making it milder.
Cooking Time: Be patient when cooking the chilla. Cooking it on a medium-low flame ensures it’s cooked evenly without burning.
Five health benefits of sprout chilla
1.Nutrient Powerhouse: Sprouts are like nature’s little miracles, bursting with essential vitamins, minerals, and antioxidants. They bring a serious nutritional punch to your plate.
2. Plant-Powered Protein: For all our fellow vegetarians and vegans out there, this dish is a protein paradise. Sprouts are loaded with plant-based protein, perfect for muscle maintenance and overall health.
3. Digestive Friend: With their high fiber content, sprouts are a boon for your digestive system. They help in smooth digestion and keep you feeling full, which can be a game-changer for those aiming to shed a few pounds.
4. Guilt-Free Pleasure: If you’re watching your calorie intake (aren’t we all?), Sprout Chilla is your go-to. It’s low in calories but big on taste and nutrition. The dream combo, right?
5. Make It Your Own: Get experimental! Sprout Chilla loves company, and you can personalize it with your favorite veggies. It’s a canvas for culinary creativity.

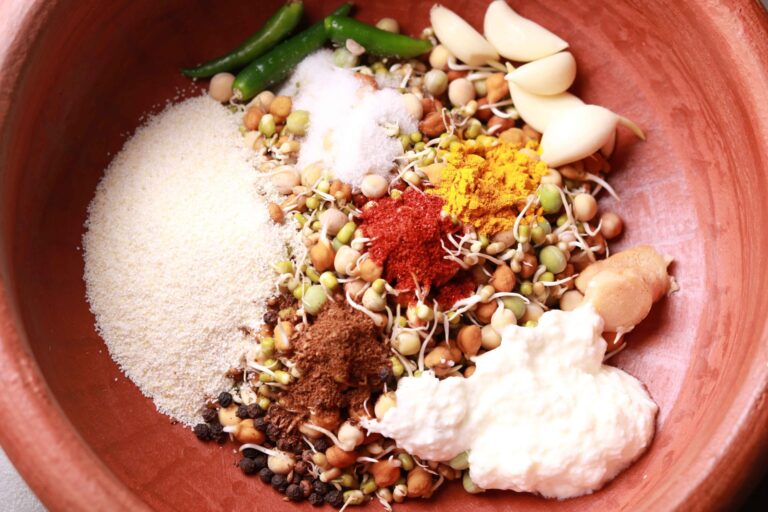
Ingredients
- 250 gm Mixed sprouts
- 4-5 Peeled garlic cloves
- 2 inch Fresh Ginger
- 3 Green chilies
- 1/2 tsp Black peppercorns
- ½ tsp Red chili powder
- ½ tsp Turmeric powder
- ¼ Cup Curd or yogurt
- ¼ cup Sooji rawa Thick
- ½ tsp Roasted Cumin seeds
- ½ tbsp Salt
- 2 Curry leaf Sprigs
- 1.5 Cup water
- Oil for making Chilla Can use Ghee or Butter
- Making Chilla Batter:
Instructions
Making Chilla Batter
- Give the sprouts a good rinse.
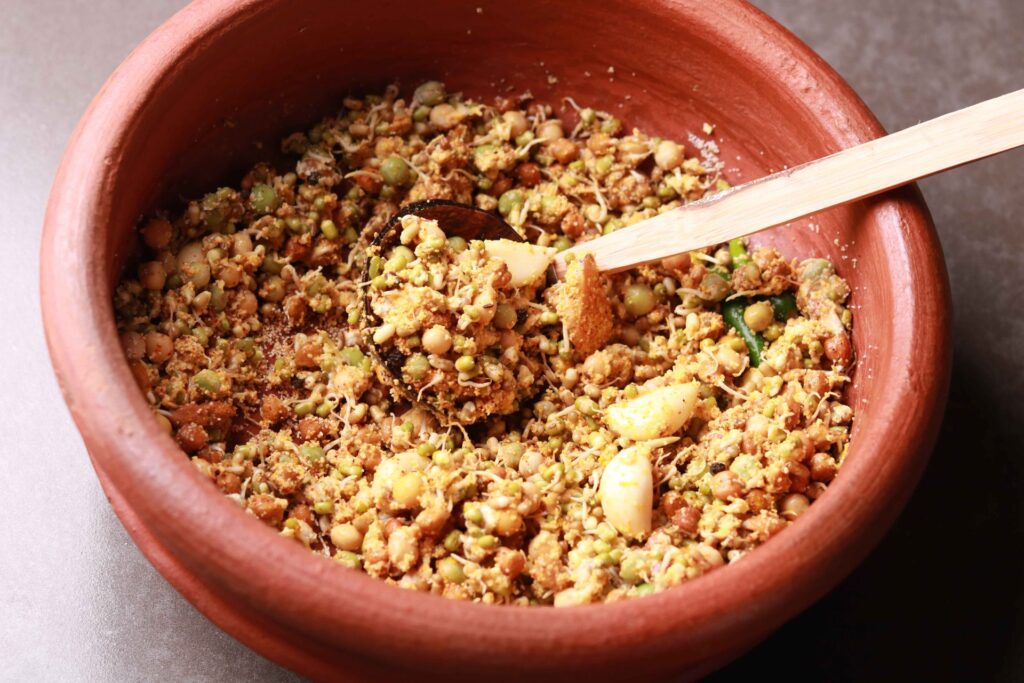
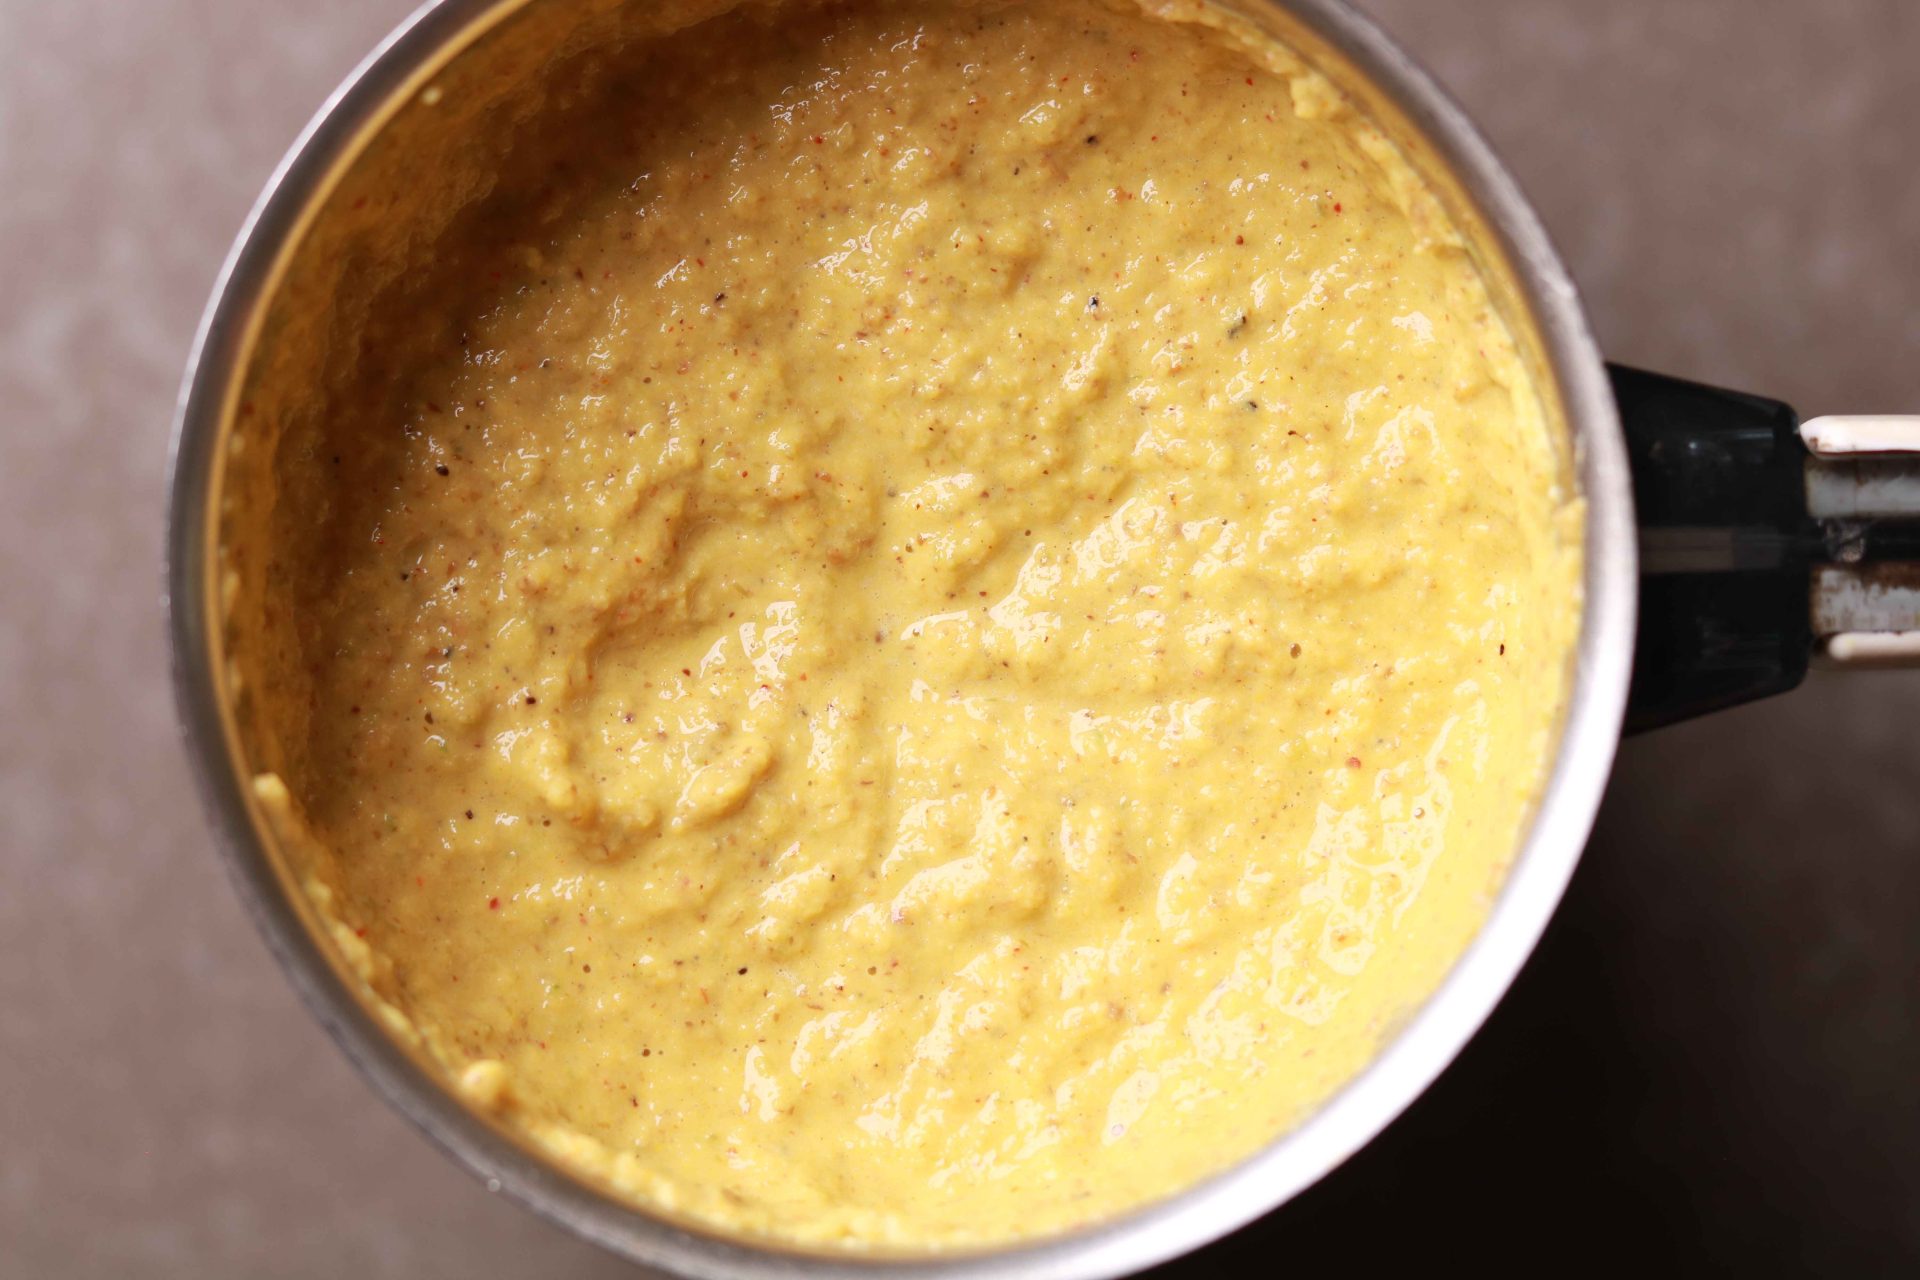
- Combine sprouts, garlic, ginger, green chilies, black peppercorns, red chili powder, turmeric powder, curd, sooji rawa, roasted cumin seeds, salt, and water in a vessel
- Put in a mixer grinder
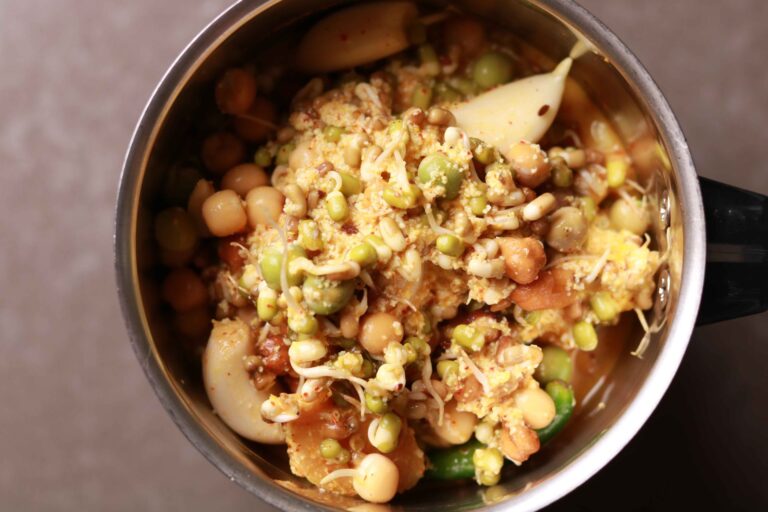
- Grind to a coarse consistency.

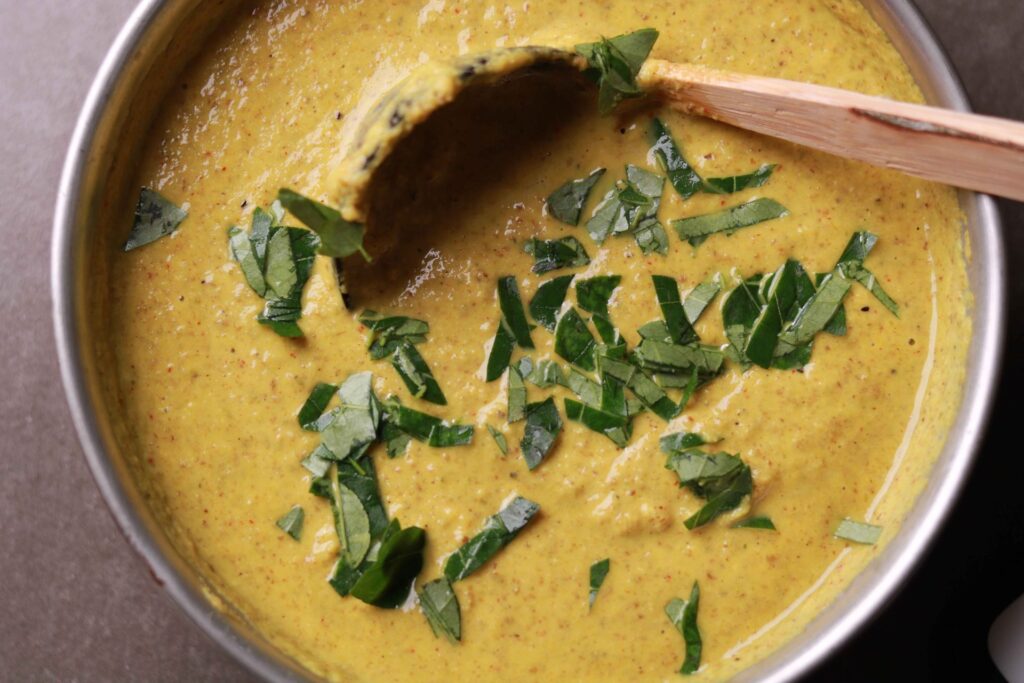
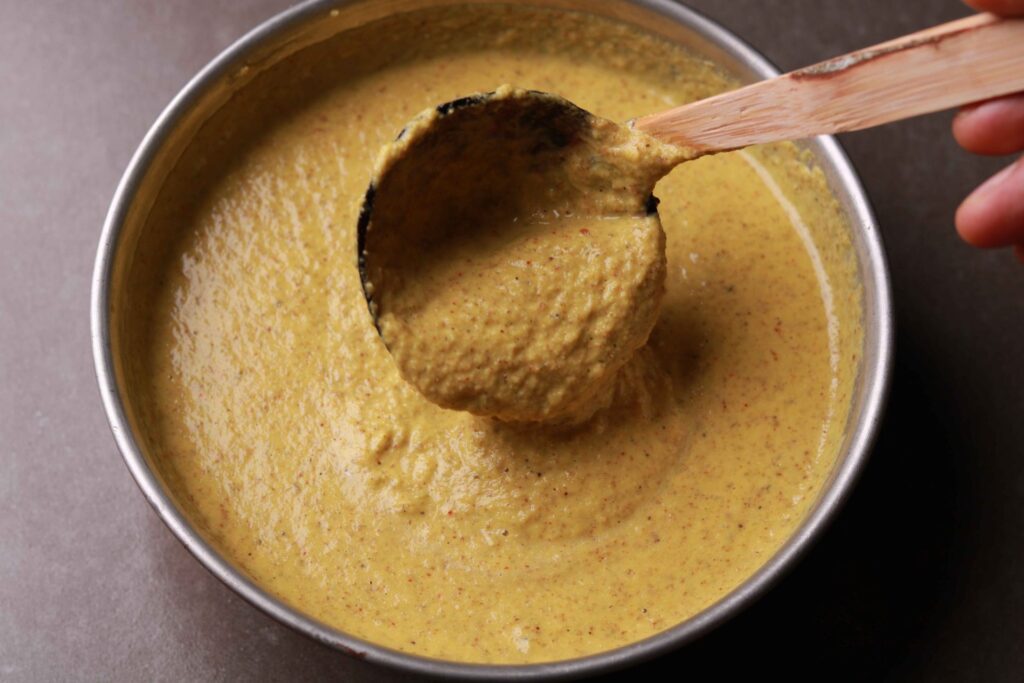
- Transfer the mixture to a bowl and add chopped curry leaves and mix.


Making Chilla
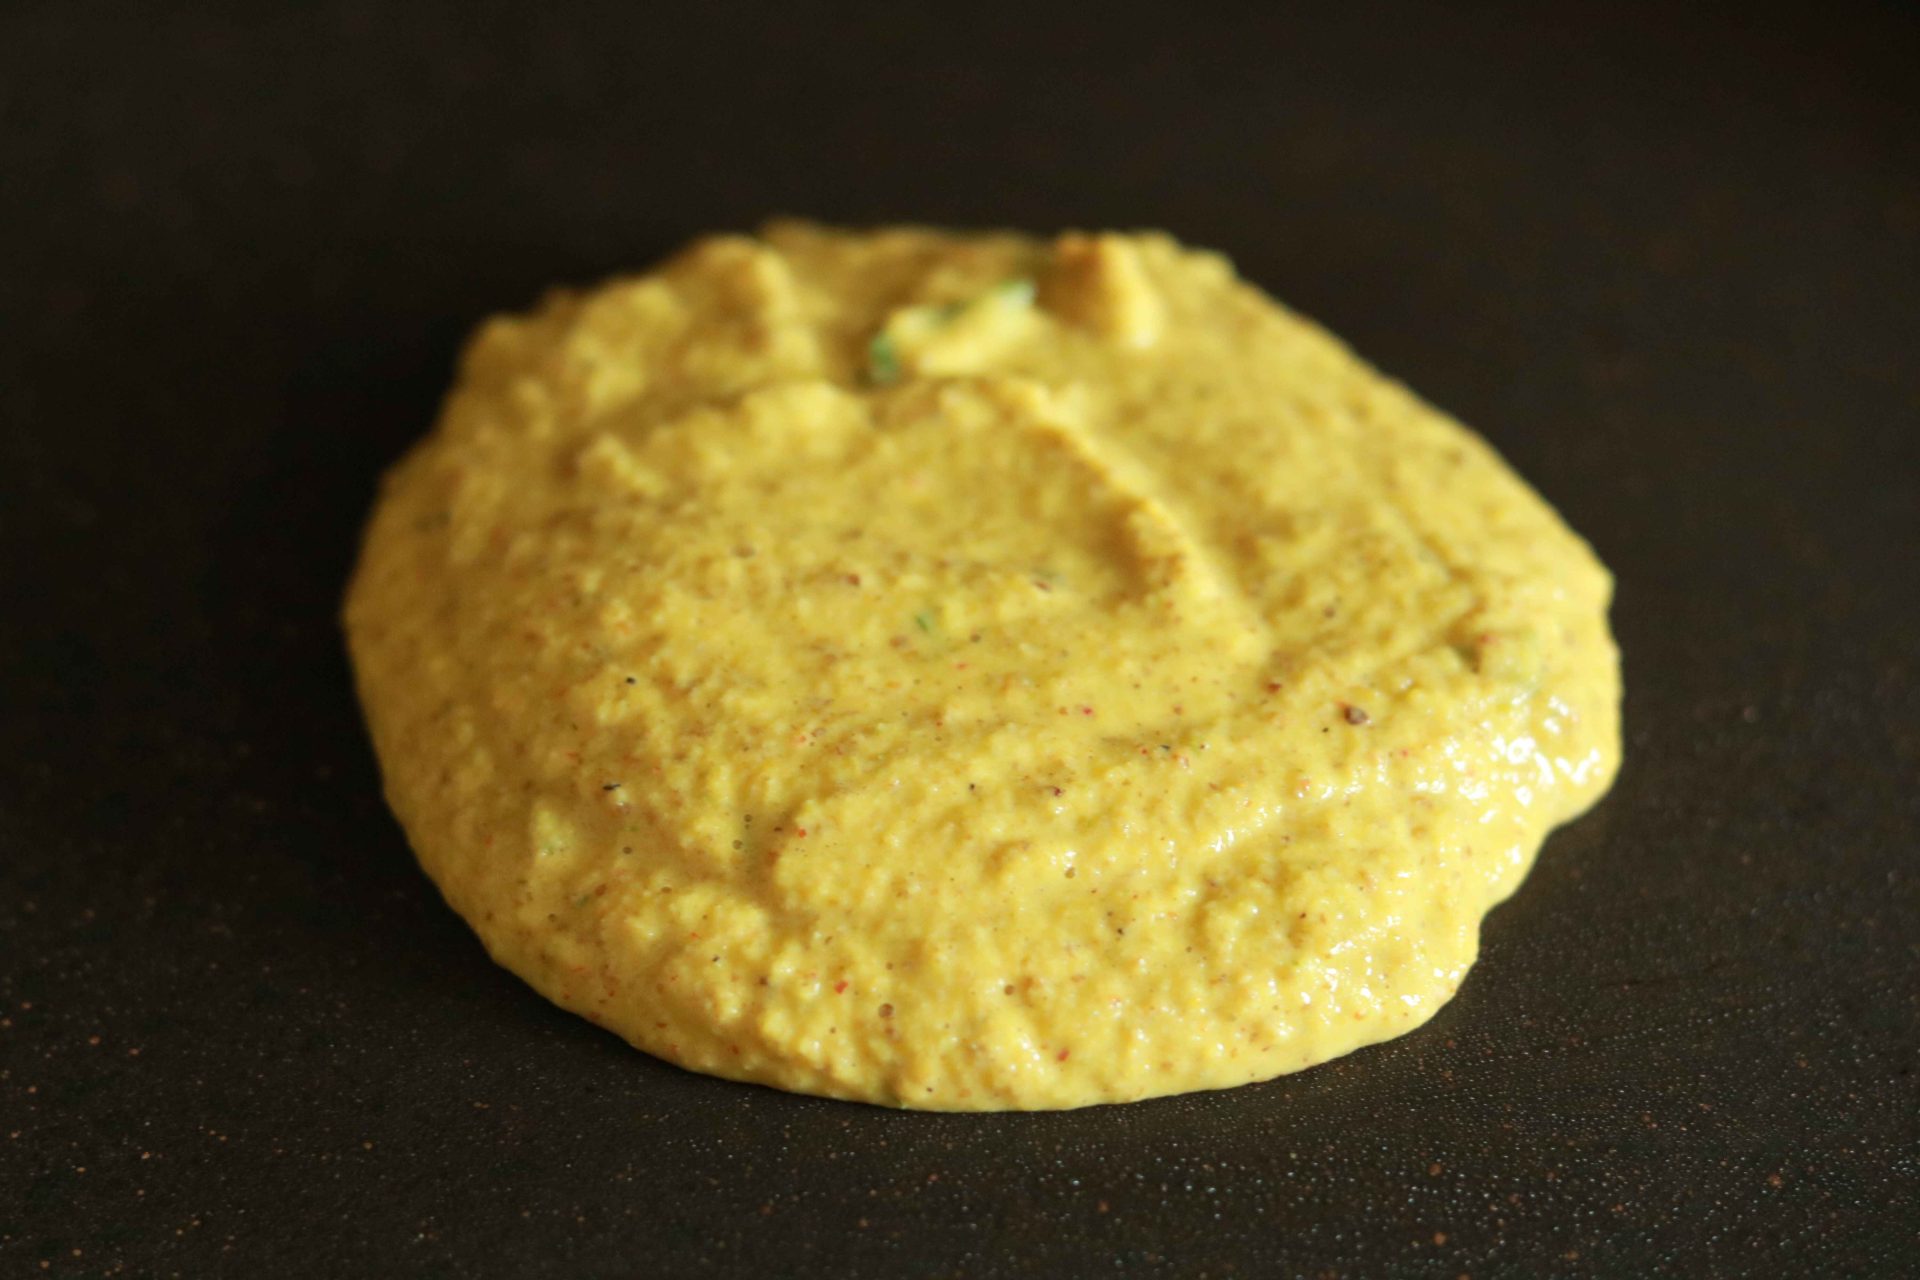
- Heat a tawa or a flat non-stick pan and brush it lightly with oil to prevent sticking. Pour the chilla batter onto the pan.

- Spread it with the back of a spoon or ladle in a circular motion from the inside to the outside. Do not press too hard.
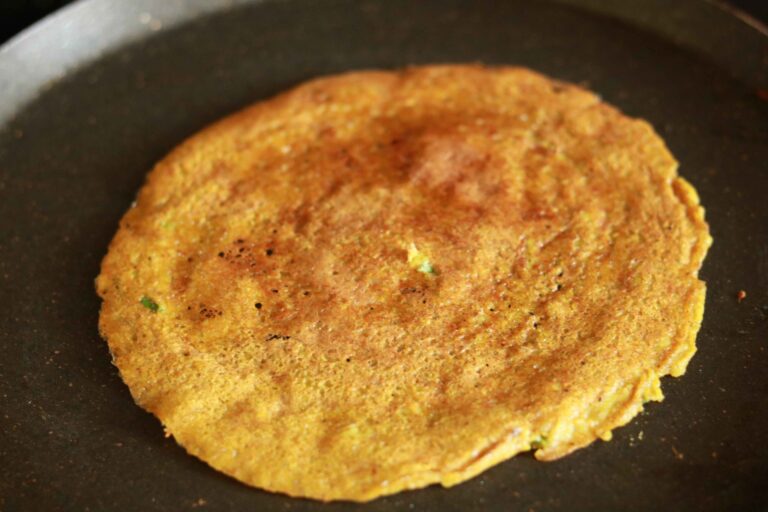
- Sprinkle a little oil or ghee and allow the chilla to cook on one side. Lift a bit to check if it has turned golden brown.
- Flip the chilla and cook the other side. Due to the fiber and moisture from the sprouts, it won’t be as crispy as a dal chilla, but the flavor compensates for it.


FAQ – your sprout Chilla queries answered
Q1: Can I use only one type of sprout for this recipe?
A1: Absolutely! Feel free to use a single variety of sprout if you prefer. The choice is yours.
Q2: Can I prepare the chilla batter in advance?
A2: Yes, you can prepare the batter in advance and store it in the refrigerator for a day or two. Just give it a good stir before making the chilla.
Q3: Is it necessary to use roasted cumin seeds?
A3: Roasted cumin seeds add a unique flavor, but if you don’t have them, you can use regular cumin seeds or skip them altogether.
Q4: Can I make this chilla oil-free?
A4: Yes, you can use a non-stick pan and cook the chilla with minimal oil or even oil-free if desired. It will still taste great!
Q5: What are the best chutneys to serve with sprouts chilla?
A5: Popular choices include mint chutney, coconut chutney, or a tangy tamarind chutney. Experiment to find your favorite combination.
Explore Our Latest Recipes
-
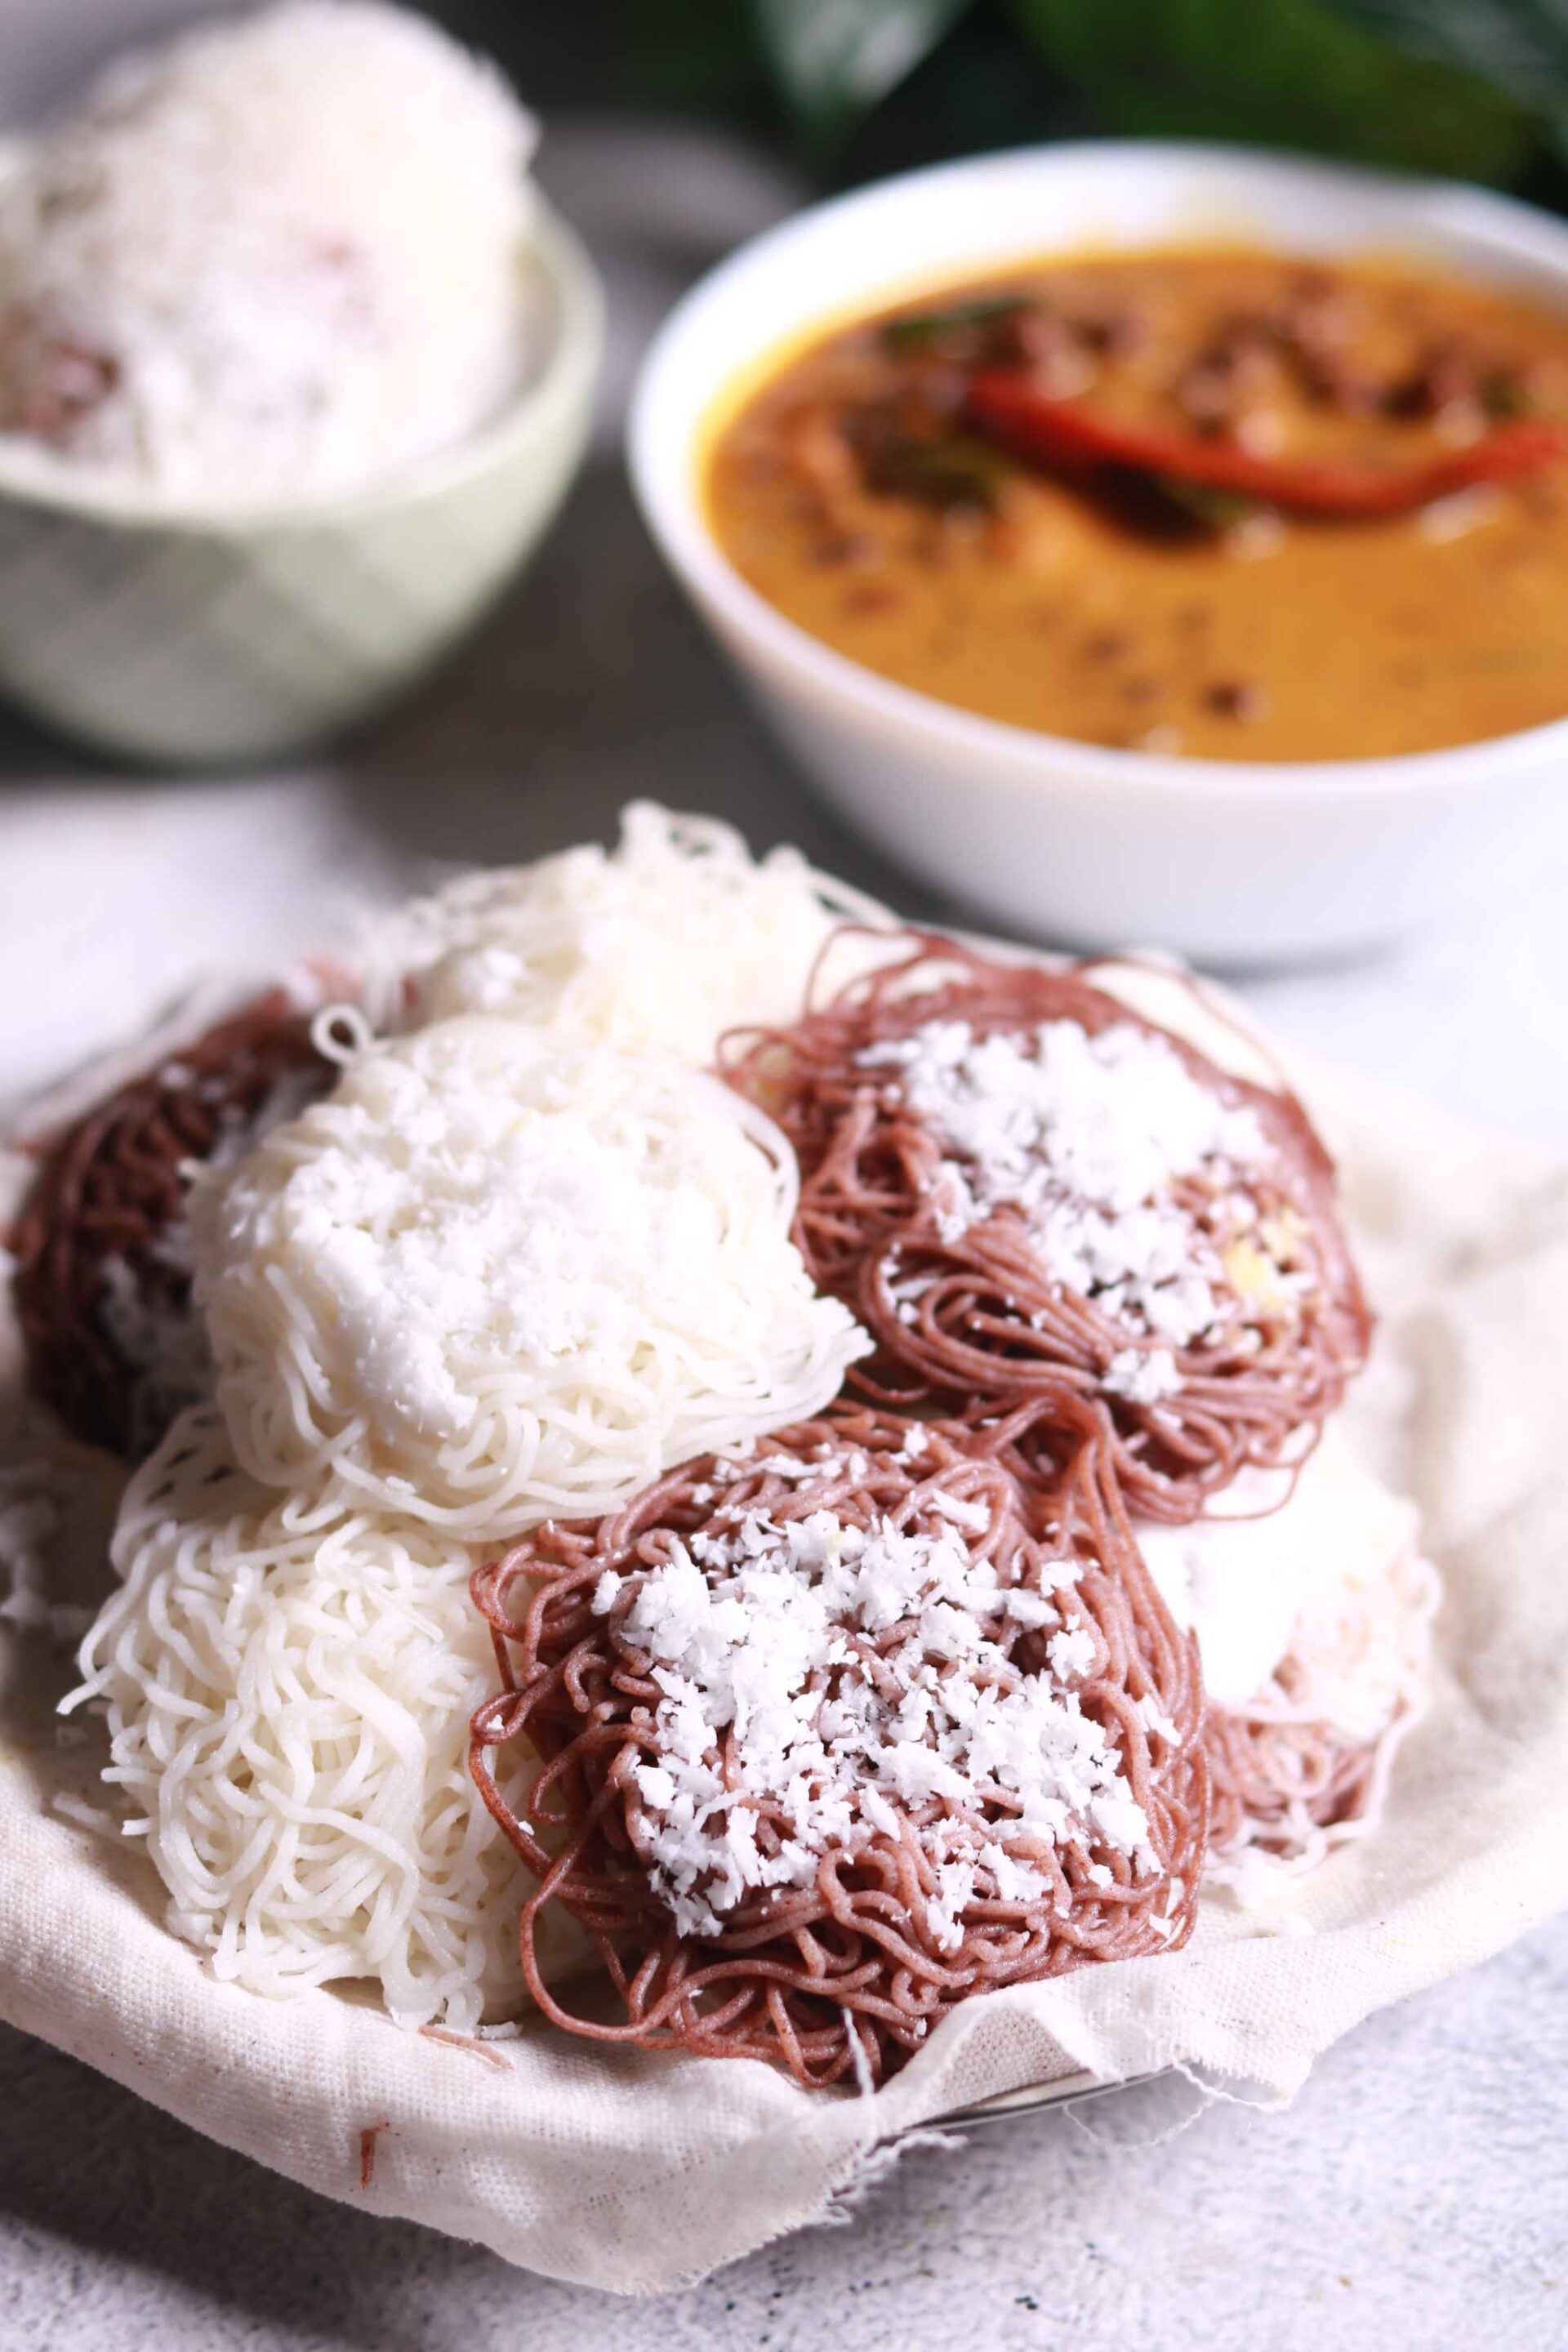
Easy Idiyappam Recipe: Soft String Hoppers Recipe from South India
Authentic Idiyappam- Hey there, if you’ve ever been lucky enough to dig into a plate of fluffy Idiyappam at a South Indian home or restaurant, you know that magic-those delicate rice noodles, steamed to perfection,… Read more
-
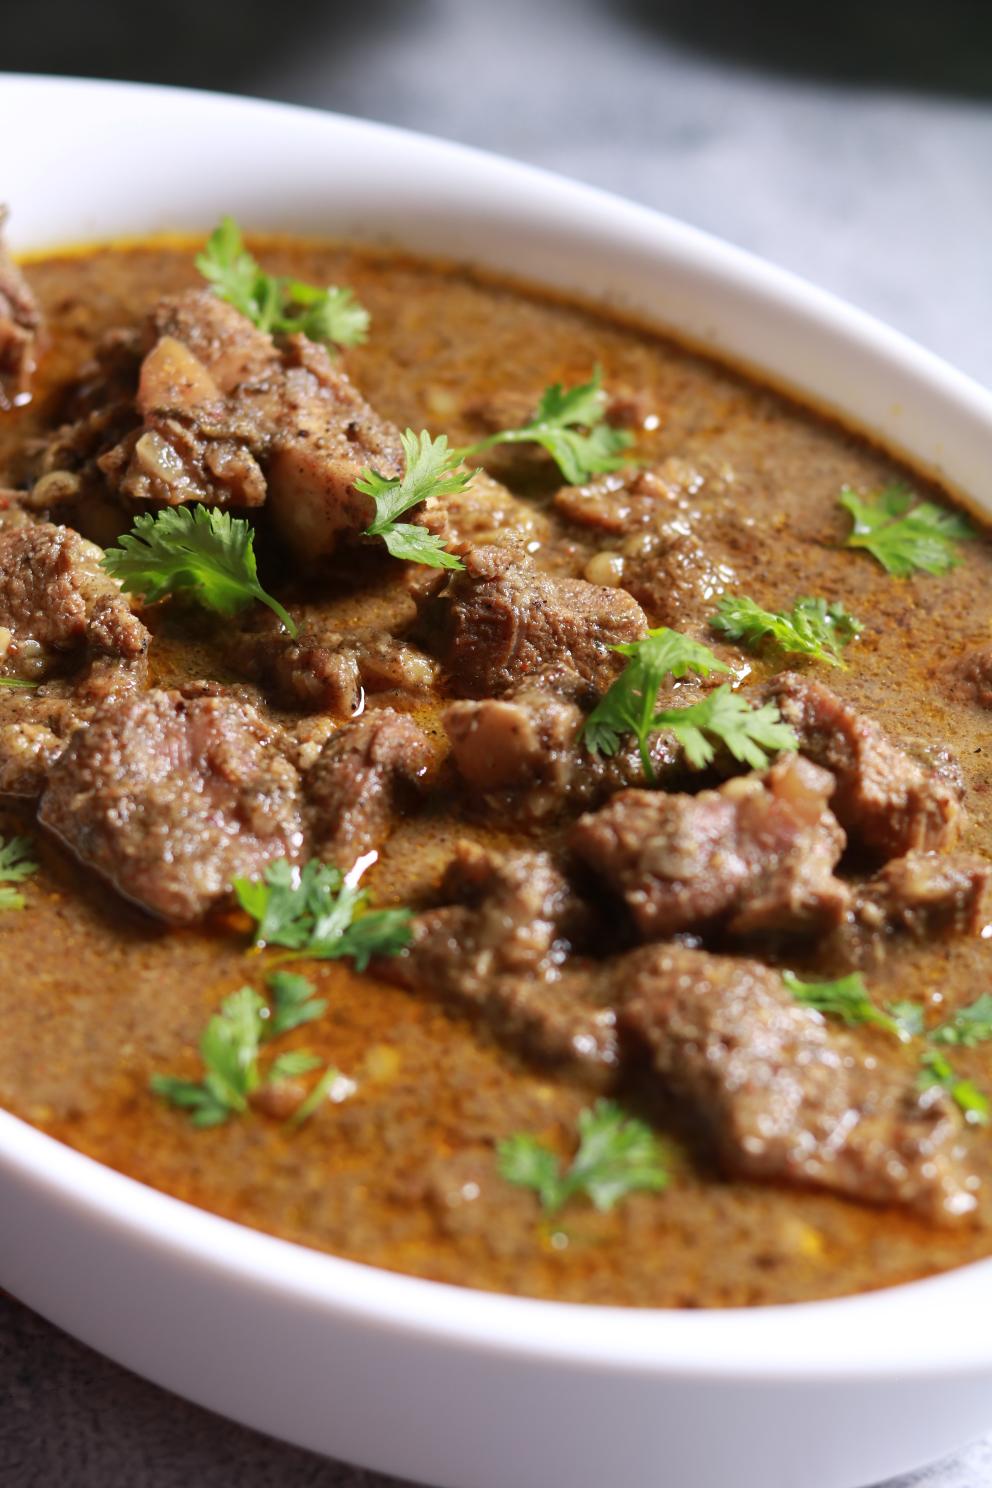
Authentic Kala Mutton Curry (Black Mutton)
Hey there, if you’re craving something rich, smoky, and downright addictive, let’s talk about black mutton curry, or kala mutton as it’s known in Maharashtra. This Maharashtrian gem gets its name from the deep, almost black… Read more
-
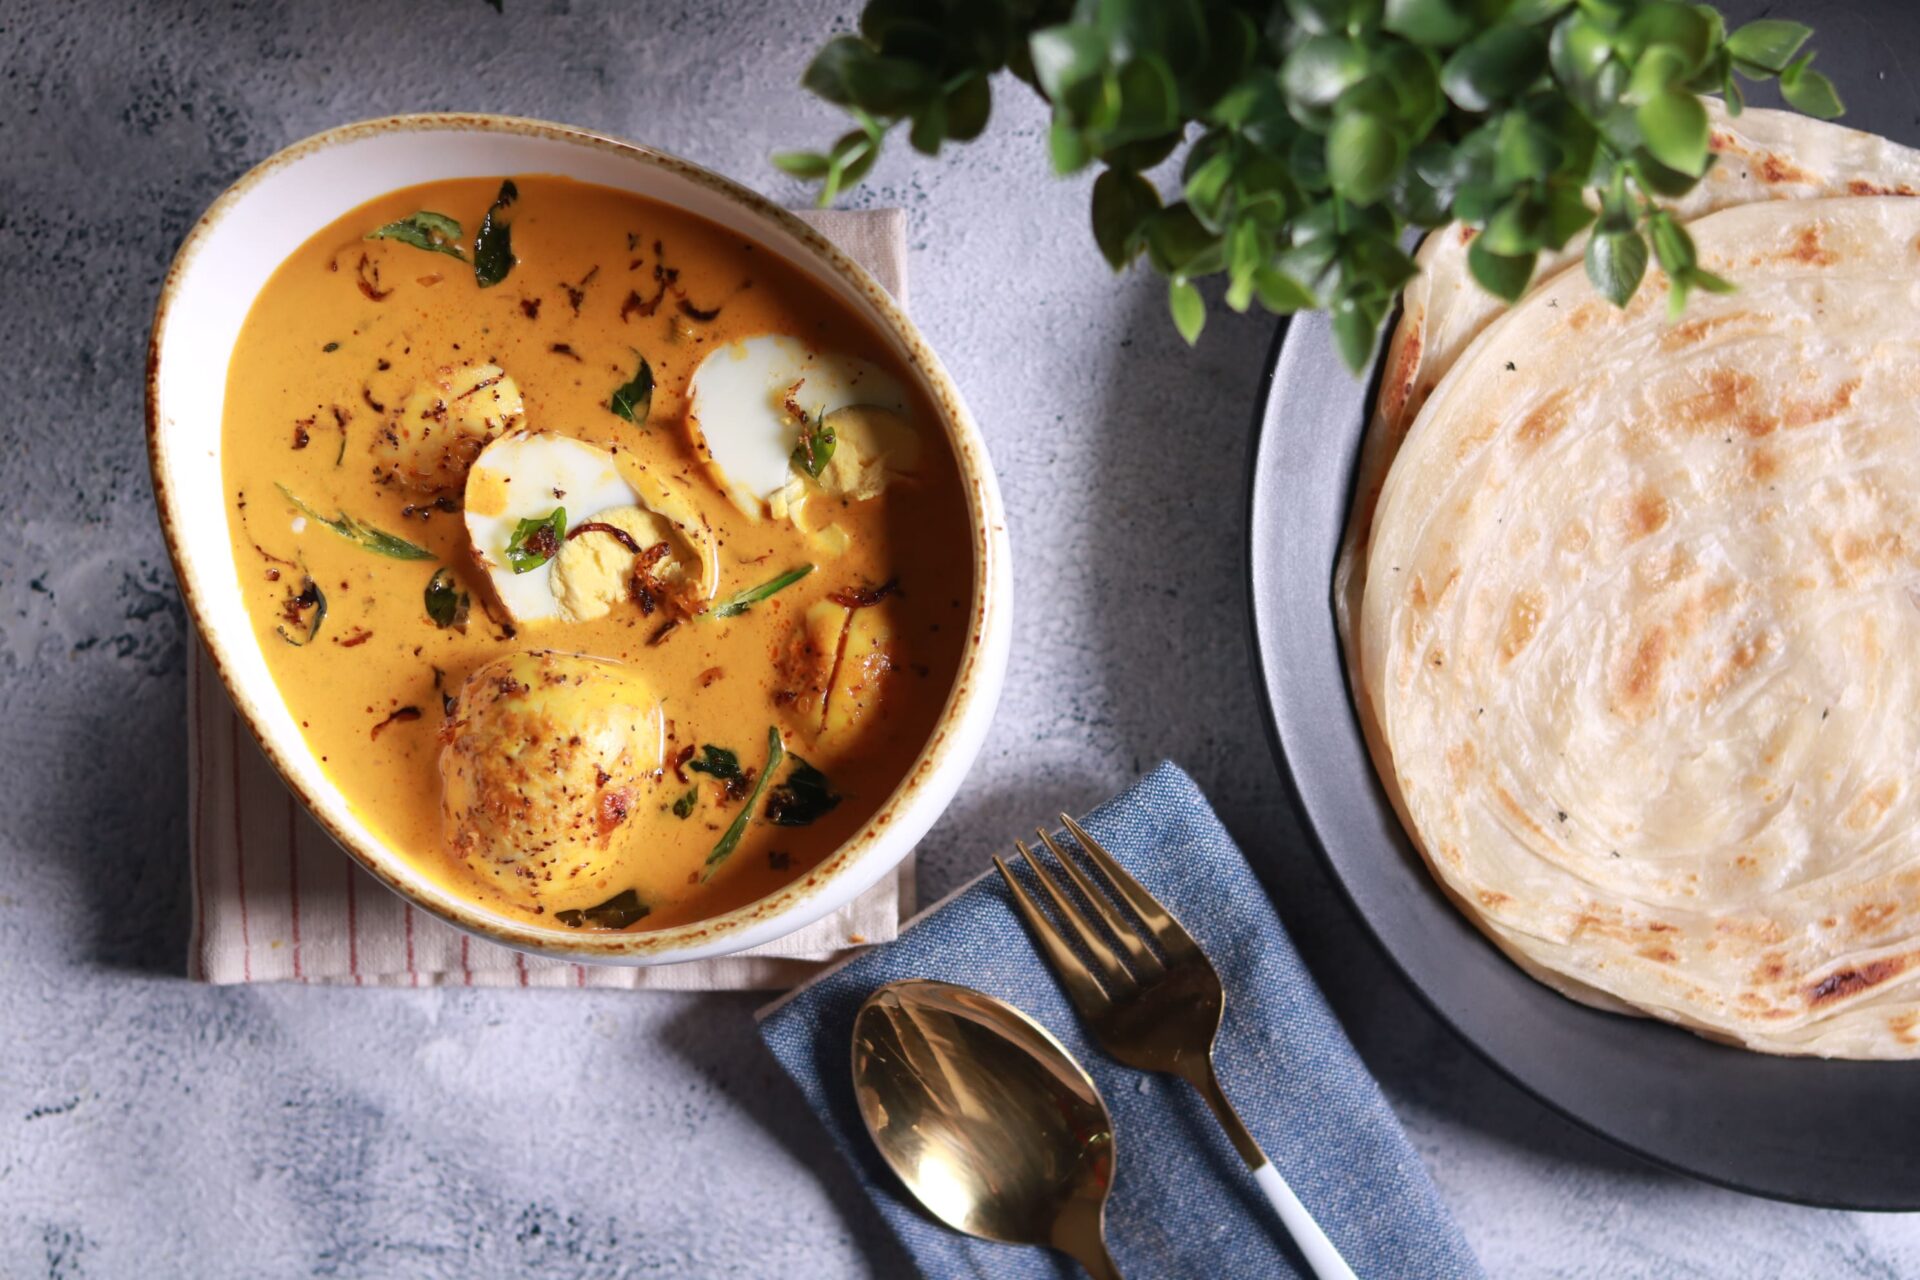
Traditional Kerala Egg Curry with Coconut Milk (Mutta Curry)
If there’s one dish that makes a slow, rainy morning in Kerala feel extra cozy, it’s a Traditional Kerala egg curry with coconut milk, served with soft Paratha or lacy dosa. This is the kind… Read more

